You can called it “CERTIFICATE GENERATION SOFTWARE FOR SCHOOLS” or “CERTIFICATE GENERATION MODULE” in School Software Pro, they are all the same.
How to Generate “SCHOOL RELIEVING or “TRANSFER or “GRADUATION CERTIFICATE” in School Software Pro.
This feature came as a result of demand by hundreds of schools in Nigeria and other countries.
It is very easy and simple to generate and track the certificate’s genuineness.
When a child graduate from nursery to primary to secondary school stage, from one school to another school, many parents and schools want to have a record(s) for these. But due to the cost and stress in generating the details/ data for each students makes it difficult for schools meet even though schools know that parents and school transfer or graduation certificate.
Read: How Parents and Teachers Relationship Increases Students’ Enrollment.
Note: In School Software Pro, students can change class either by promotion, graduation or students leaving the school. To generate student certificate, you must be graduated or archived as old.
There is a default setting TRANSFER or “GRADUATION CERTIFICATE template in School Software Pro. You can change the settings to suit your specific institution needs. TC in School Software Pro can be track as it has a unique number that can be system generated or manually assigned number.
STEPS TO GENERATE TRANSFER or GRADUATION CERTICATE:
To generate TC for students is simple and self-explanatory. In this writing, we divided it into two parts. Part A: SETTINGS
Part B: CERTIFICATE GENERATION
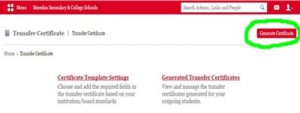
Part A “Settings”: Click on MENU >> ACADEMICS >> CERTIFICATE TEMPLATE SETTINGS>> Top right >> PREVIEW CERTIFICATE and print.
Fig.1
The Certificate will be generated with your school details that are in your general settings.
You can manually give it Certificate No or the system will automatically assign a number to the certificate.
However, School Software Pro gives you the option of editing the Certificate Template or Settings.
1. HOW TO EDIT CERTIFICATE TEMPLATE SETTINGS IN SCHOOL SOFTWARE PRO.
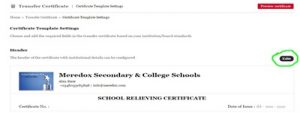
Click on TRANSFER CERTIFICATE > CERTIFICATE TEMPLATE SETTINGS. You choose and add the required fields in the transfer certificate based on your school/ institution/board standards.
On right top, Click EDITH. There you have two options of header, system and hard paper head.
Fig.2
Header Settings
The header of the certificate with institutional details can be configured
SYSTEM HEADER. The template can be designed based on the requirement and the certificate can be printed in a blank sheet.
As an institution, you have the option of adding or deleting details that will appear on your TC header.
x Do not generate header. Leave blank space
PAPER HEAD. Recommended, If a printed sheet with institution details is used to print the certificate. This is the option of using your institutional Hard Copy Letter Head.
To use your institution Letter Head, select
x DO NOT GENERATE HEADER, on the BLANK SPACE FROM TOP* type the line space of your hard copy letter head.
Read: Academic Report Management Software for Schools
2. STUDENT DETAILS
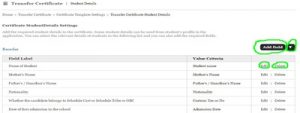
Various student details required in the certificate can be configured. There are few students details that can be used from the system and few custom fields that are to be specified while issuing.
You can edit, delete or add more fields as heading or sub-heading.
Fig.3
3. SIGNATURE AND CLAUSES
In this section, you can configure the signatures and seals required to authenticate the certificate from your institution. You can also add any clauses and terms regarding the legitimacy of the details in the certificate
You can edit, add more or completely ignore the signature space.
Part B “TRANSFER CERTIFICATE”: Click on MENU >> ACADEMICS >> TRANSFER CERTIFICATE
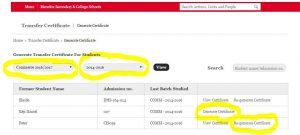
Admin have several ways to fetch the students’ details in which he/she want to generate its certificate.
You can type in the student name or number on the SEARCH space
or
Select CLASS >> BATCH >> VIEW
You chose the student and generate the certificate.
Fig.4


